Walkthrough 7-2: Pass events between flows using the VM connector
In this walkthrough, you pass events between flows using asynchronous queues. You will:
· Pass events between flows using the VM connector.
· Explore variable persistence with VM communication.
· Publish content to a VM queue and then wait for a response.
· Publish content to a VM queue without waiting for a response.

Starting file
If you did not complete the previous walkthrough, you can get a starting file here. This file is also located in the solutions folder of the student files ZIP located in the Course Resources.
Add the VM module to the project
1. Return to apdev-examples.xml.
2. In the Mule Palette, select Add Modules.
3. Select the VM connector in the right side of the Mule Palette and drag and drop it into the left side.
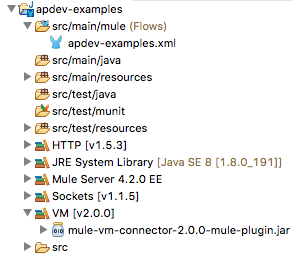
4. In the Project Explorer, locate the JAR file for the VM connector.
Add a VM Publish Consume operation
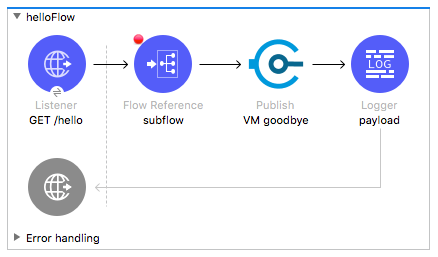
5. In helloFlow, delete the privateFlow Flow Reference.
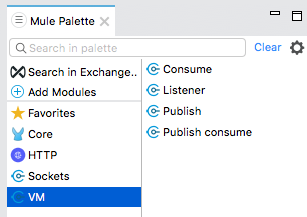
6. Select VM in the Mule Palette.
7. Select the Publish consume operation and drag and drop it before the Logger in helloFlow.
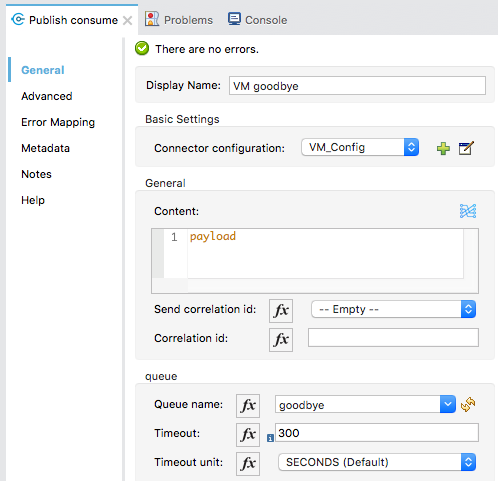
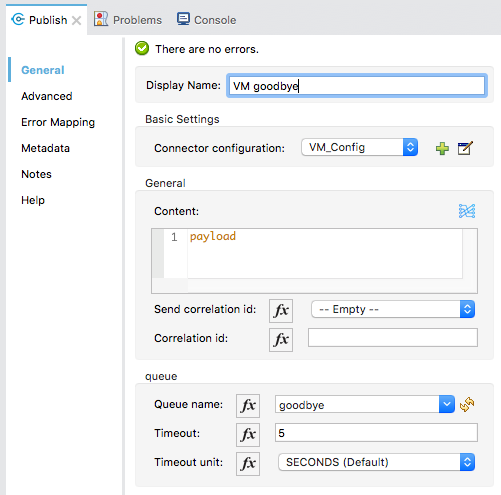
8. In the Publish consume properties view, change the display name to VM goodbye.
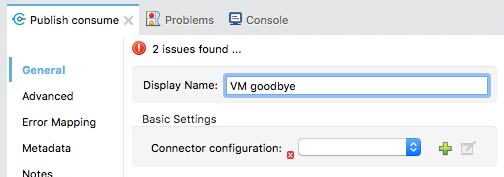
9. Click the Add button next to connector configuration.
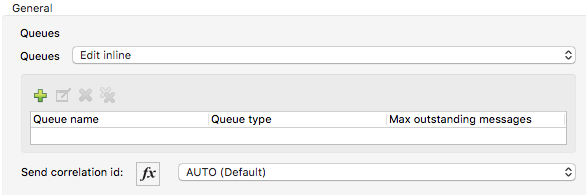
10. In the queues drop-down menu, select Edit inline then click the Add Queue button.
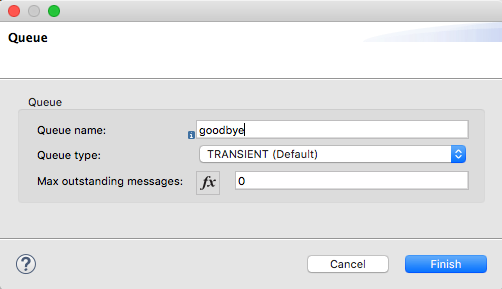
11. In the Queue dialog box, set the queue name to goodbye and click Finish.
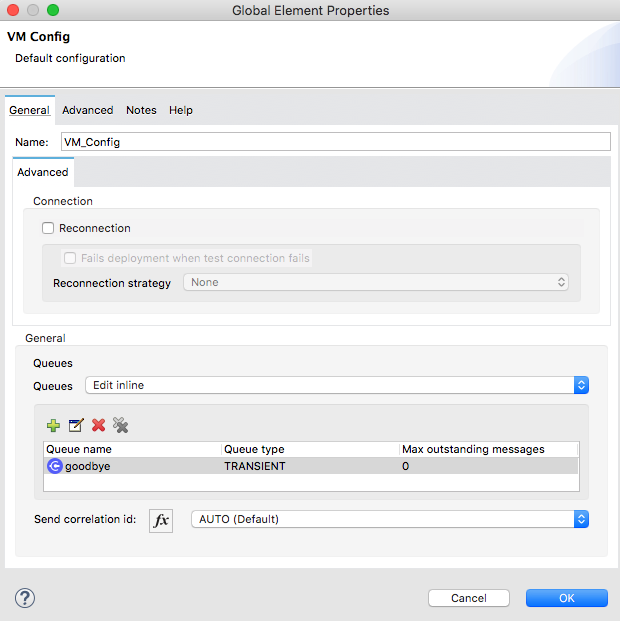
12. In the Global Element Properties dialog box, click OK.
13. In the VM goodbye Publish consume properties view, set the queue name to goodbye.
Note: If you do not see the queue name in the drop-down menu, click the refresh icon for it to be populated and then set it.
14. Set the timeout to 300 seconds for debugging purposes.
Add a VM Listener
15. Expand goodbyeFlow and delete its HTTP Listener.
16. Locate the Listener operation for the VM connector in the right side of the Mule Palette and drag and drop it in the source section of goodbyeFlow.
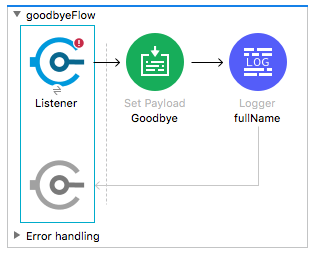
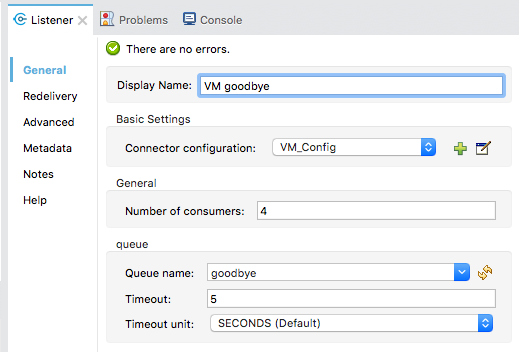
17. In the VM Listener properties view, change the display name to VM goodbye.
18. Ensure the connector configuration is set to the existing VM_Config and the queue name is set to goodbye.
Debug the application
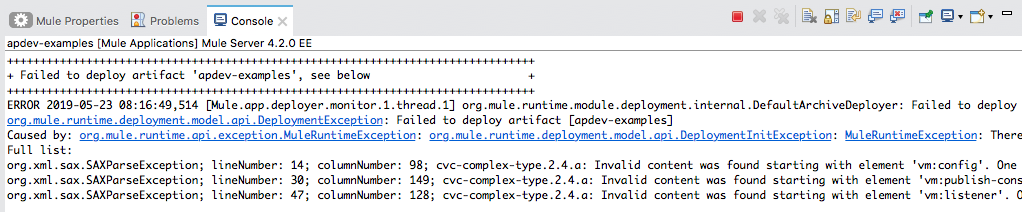
19. Save the file to redeploy the project in debug mode; the deployment should fail with a number of errors including 3 invalid content errors.
20. Stop the project.
21. Debug the project; the application should successfully deploy.
22. In Advanced REST Client, send the same request.
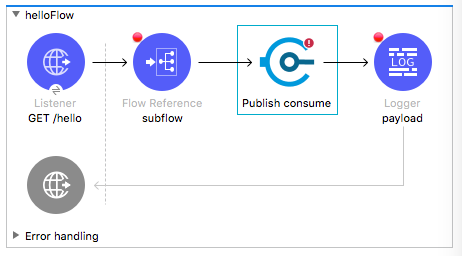
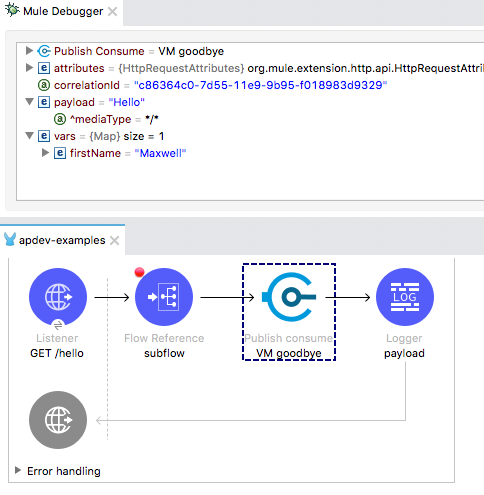
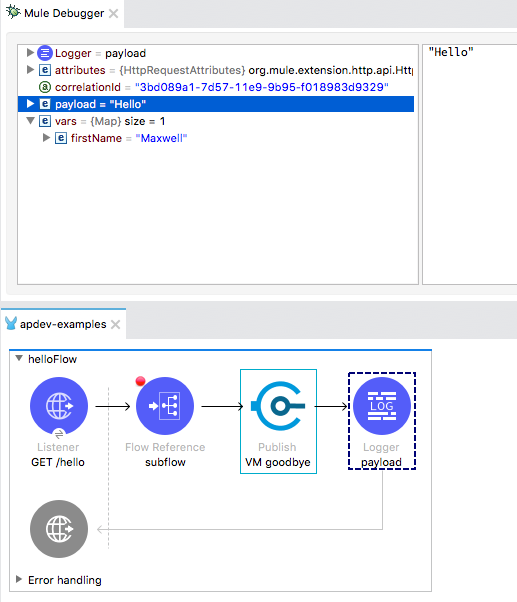
23. In the Mule Debugger, step through the application to the VM Publish consume.
24. Look at the payload, attributes, and variables.
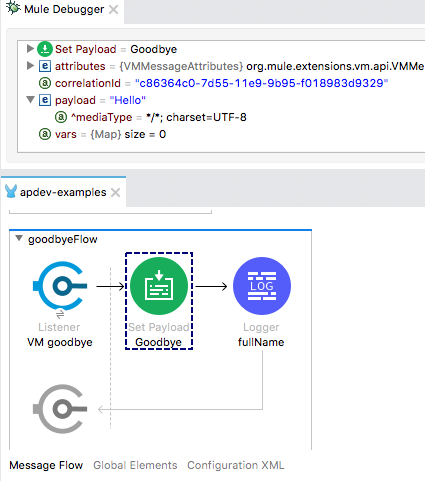
25. Step into goodbyeFlow.
26. Look at the payload, attributes, and variables (or lack thereof).
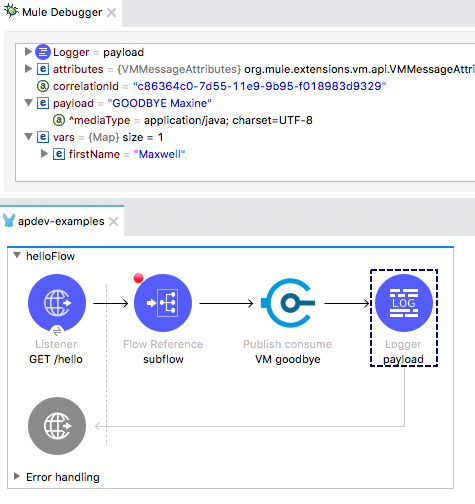
27. Step through the flow until the event returns to helloFlow.
28. Look at the payload, attributes, and variables.
29. Step through the rest of the application.
30. Switch perspectives.
Change the VM Publish Consume operation to Publish
31. Delete the VM Publish consume operation in helloFlow.
32. Drag a VM Publish operation from the Mule Palette and drop it before the Logger.
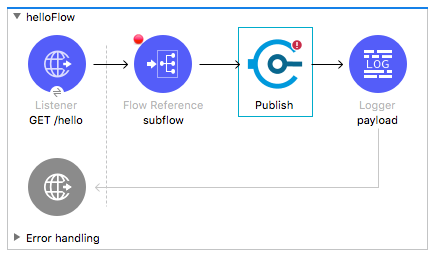
33. In the Publish properties view, set the display name to VM goodbye.
34. Ensure the connector configuration is set to the existing VM_Config and the queue name is set to goodbye.
Debug the application
35. Save the file to redeploy the project in debug mode.
36. In Advanced REST Client, send the same request.
37. In the Mule Debugger, step through the application to the VM Publish operation.
38. Step again; you should step to the Logger in helloFlow.
39. Look at the value of the payload.
40. Step again; you should see execution stopped in goodbyeFlow.
41. Step to the end of the application.
42. Return to Advanced REST Client; you should see a response of Hello – not GOODBYE.

43. Return to Anypoint Studio and switch perspectives.
44. Stop the project.